How to Enable Arris Router Port Forwarding [Screenshot Guide]
It can be irritating when you want to go to a particular website and you can’t. This generally happens due to an inbuilt firewall of the router and Arris routers are no exception. Port forwarding Arris router can help a user visit that website or server. What is Arris Port Forwarding and how to enable it? Let’s find out!
What is Arris Router Port Forwarding?
You got to know that the router’s firewall blocks access to different servers. The Port Forwarding rules are like keys for those sites. It means if you enable Port Forwarding on your router and set up rules for it, ports for those sites will be open on your router.
In easy words, you will be able to bypass the router’s firewall and access the website. Thus, Arris Port Forwarding removes the blockage that exists between you and some web servers. Let us now move ahead and discuss what you should do to port forward an Arris router.
How to Enable Arris Port Forwarding?
It is very easy to port forward an Arris router. The steps to complete the process are the same no matter whether you are enabling Arris Surfboard Port Forwarding or are setting rules for another router model. Here’s what you should do:
Step 1: Log in and Access Firewall Settings
- Connect a computer to the WiFi network of your Arris router.
- You can also use an Ethernet cable for the connection.
- Open Google Chrome or a similar web browser on your computer.
- Using the 192.168.0.1 IP and Admin and password as Username and Password, log in to your Arris router.
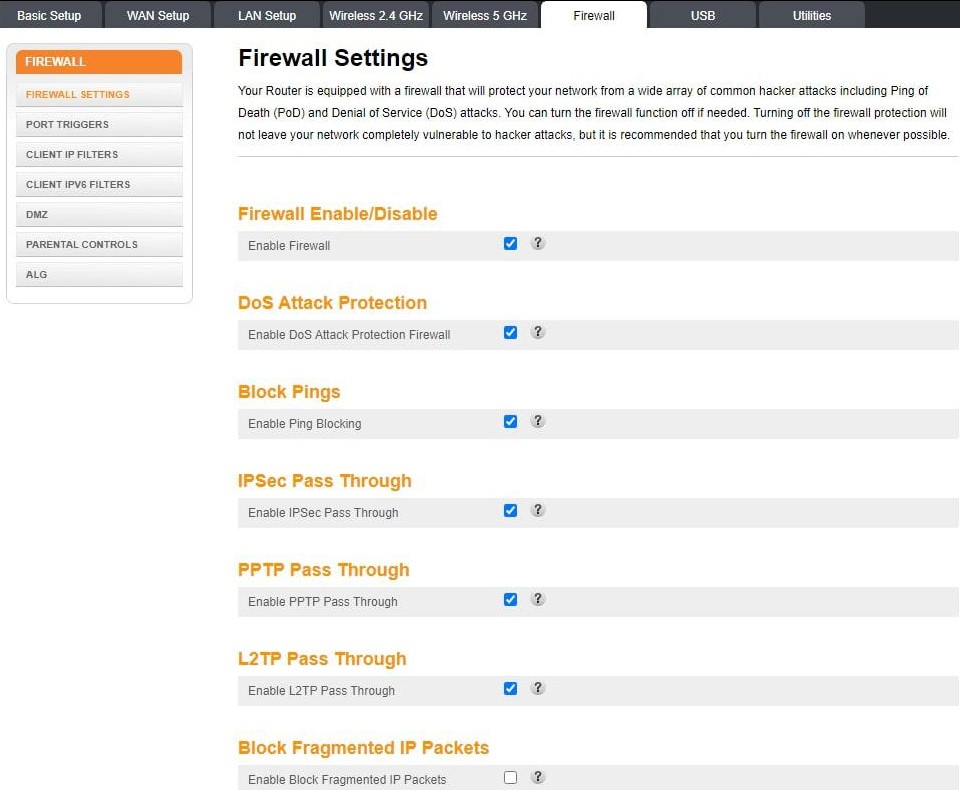
- On the dashboard or STATUS page of the router, click Firewall.

Step 2: Move to Virtual Servers
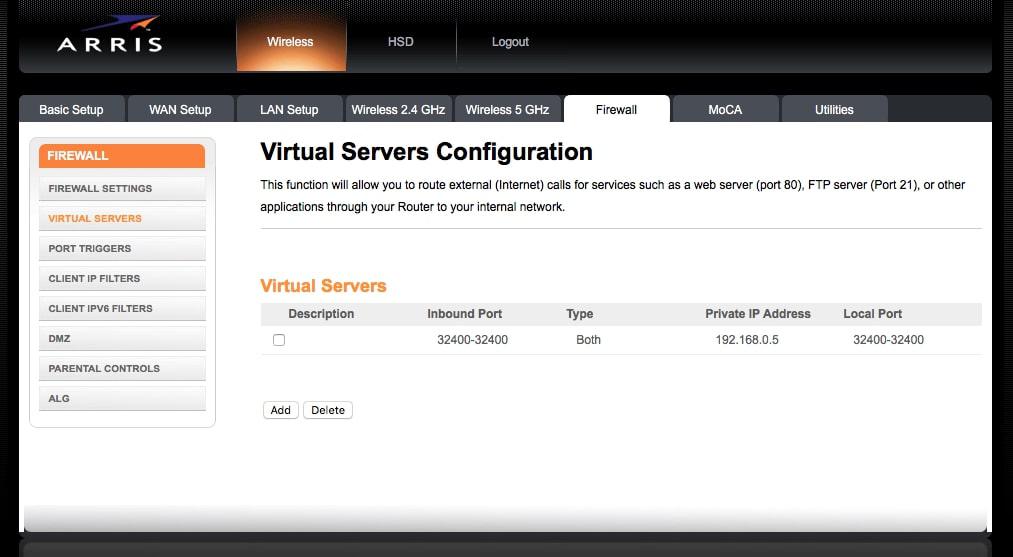
- Now, you need to select the Virtual Servers/Port Forwarding tab.
- This option is located below Firewall Settings option.
Note: Menus may vary for some Arris routers.

Step 3: Add Servers
- Now, click the Add button on the next window.
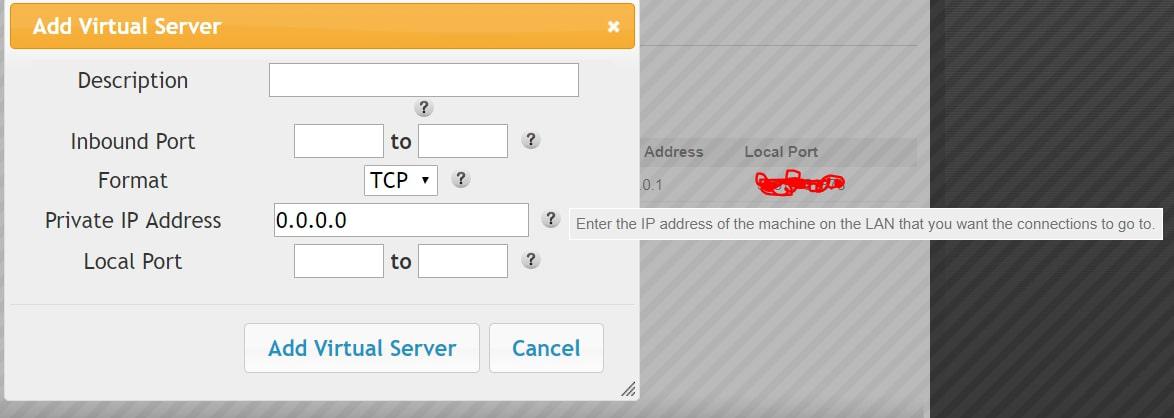
- This will open up a pop-up labeled “Add Virtual Server”.
- You need to select an inbound HTTP port range from 80 to 80.
- From the Format drop-down menu, select TCP.
- Input the computer’s static IP into the Private IP Address field.
- After that, select Add Virtual Server.
- Arris Port Forwarding is now configured.

This is how you can port forward an Arris router by accessing the Arris router login page. You are now free to access those web servers that you weren’t able to previously. For your information, port forwarding rules can be set for app and gaming servers that you want to access but cannot due to the built-in firewall on the router.
Note: The port forwarding feature is a good utility. But, you should be very careful while opening ports for applications and programs. This is because sometimes, the user accidentally opens a port for a malicious site or program that contains viruses.
Summing Up
With that, we have now reached the end of the post that revealed how to set up Arris router port forwarding. Now, you are all set to enjoy accessing websites that you couldn’t access before configuring Port Forwarding. In case you fail to enable the feature, you should reboot the router and follow the above-given steps once again.
